
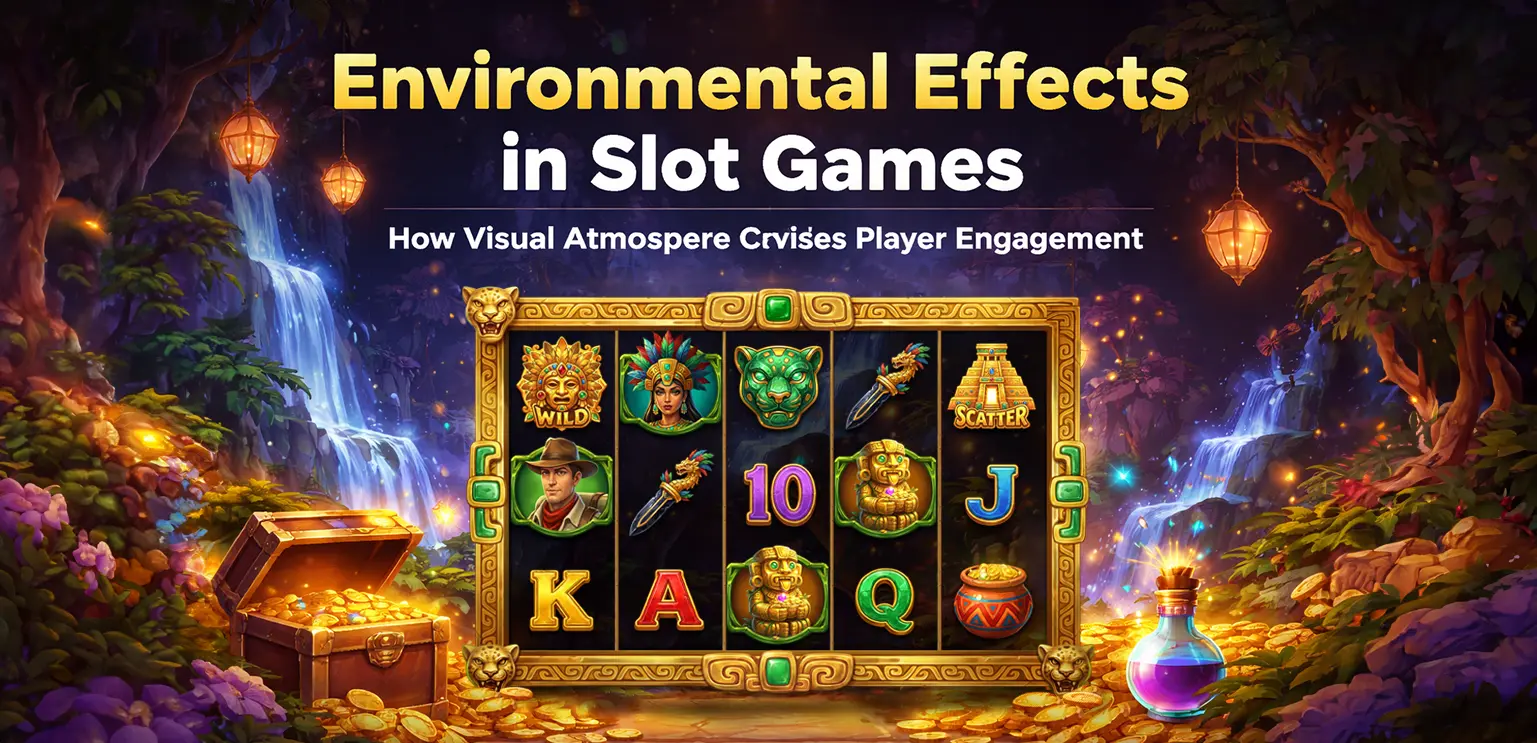
Environmental Effects in Slot Games: How Visual Atmosphere Drives Player Engagement
Learn how environmental effects in slot games like lighting, VFX, and backgrounds improve immersion mood, and player engagement.
We share trending game industry news, development experiences, and tricks and tips to create successful games.
Learn how environmental effects in slot games like lighting, VFX, and backgrounds improve immersion mood, and player engagement.
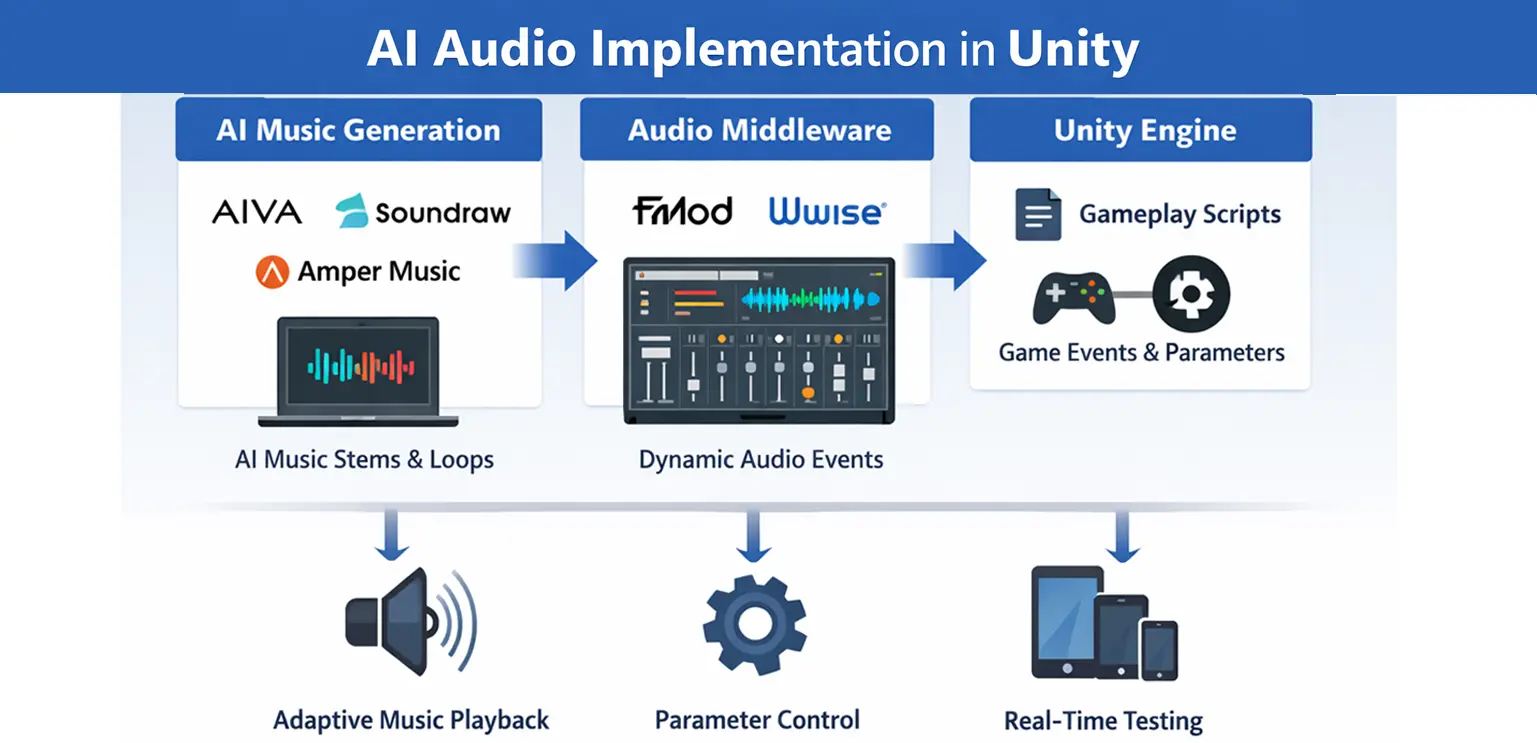
Learn how to implement AI-generated audio in Unity using FMOD, Wwise, and tools like AIVA and Soundraw for adaptive game music systems.
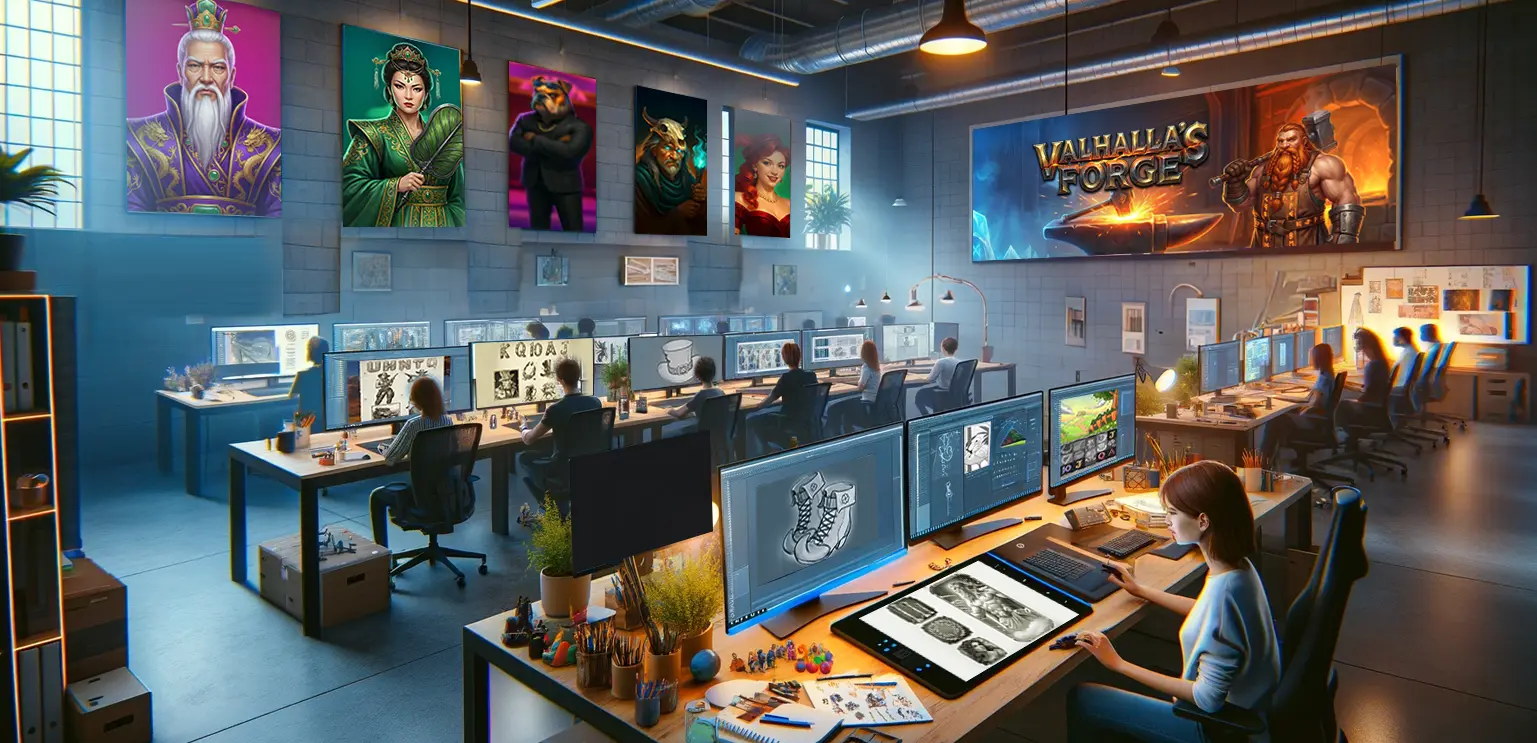
Discover why outsourced game art has become a strategic move for studios, from production scalability to cost efficiency and faster development.
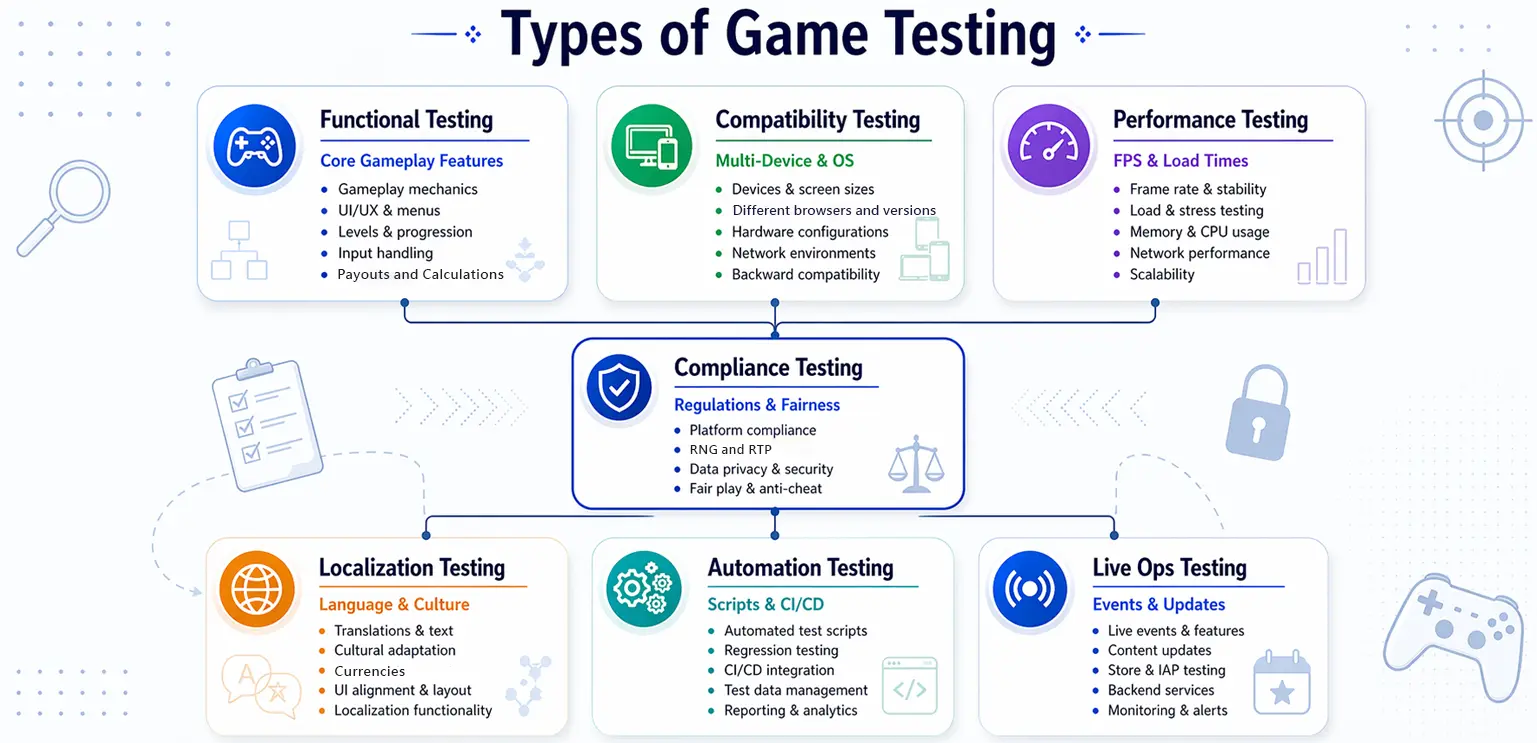
Learn different types of game testing, from functional QA to Live Ops and casino compliance testing, with real-world insights for developers.
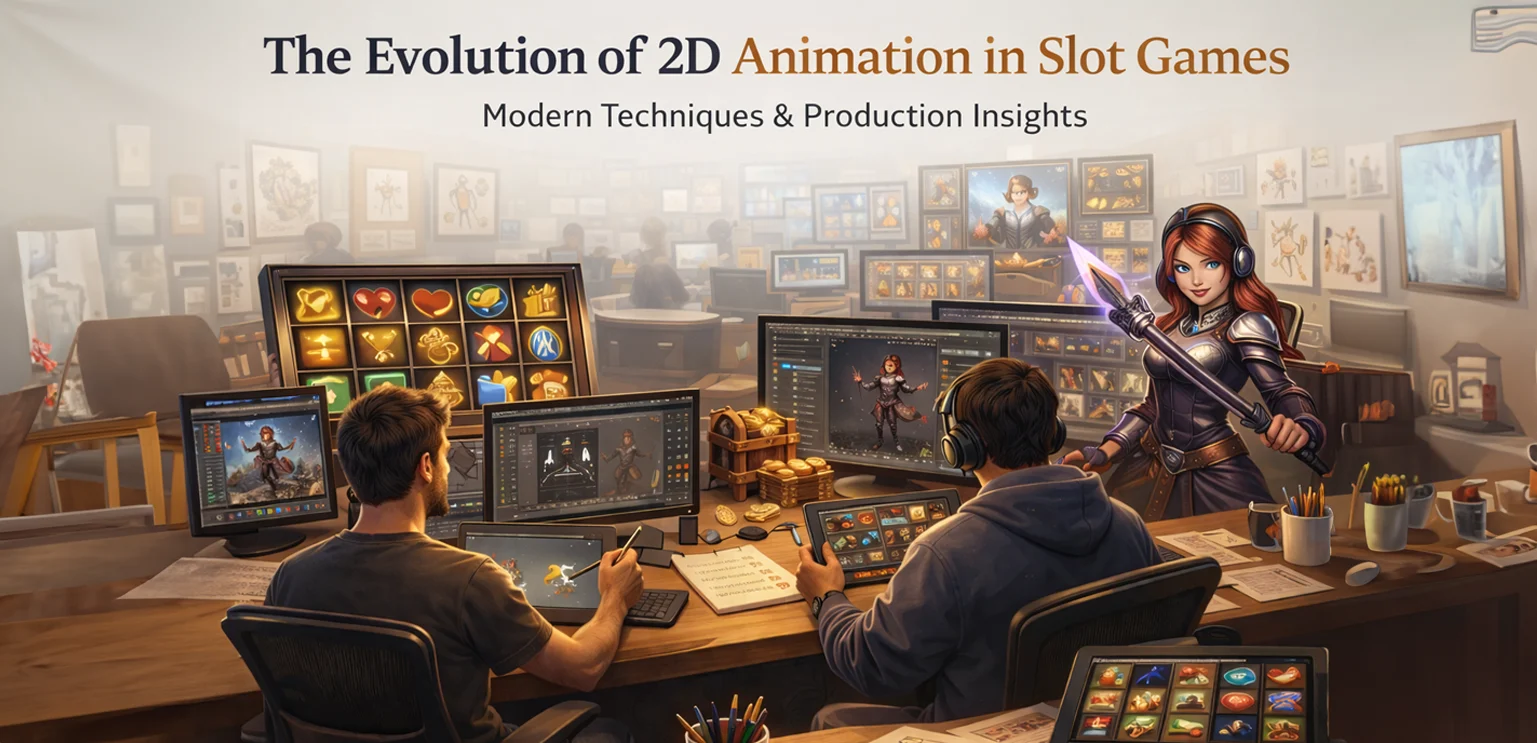
Explore how 2D animation in slot games evolved, including modern techniques, production pipelines, and real-world development insights.

Discover the top mobile gaming innovations transforming online casinos, from instant play and AI personalization to Live Ops and adaptive UX.
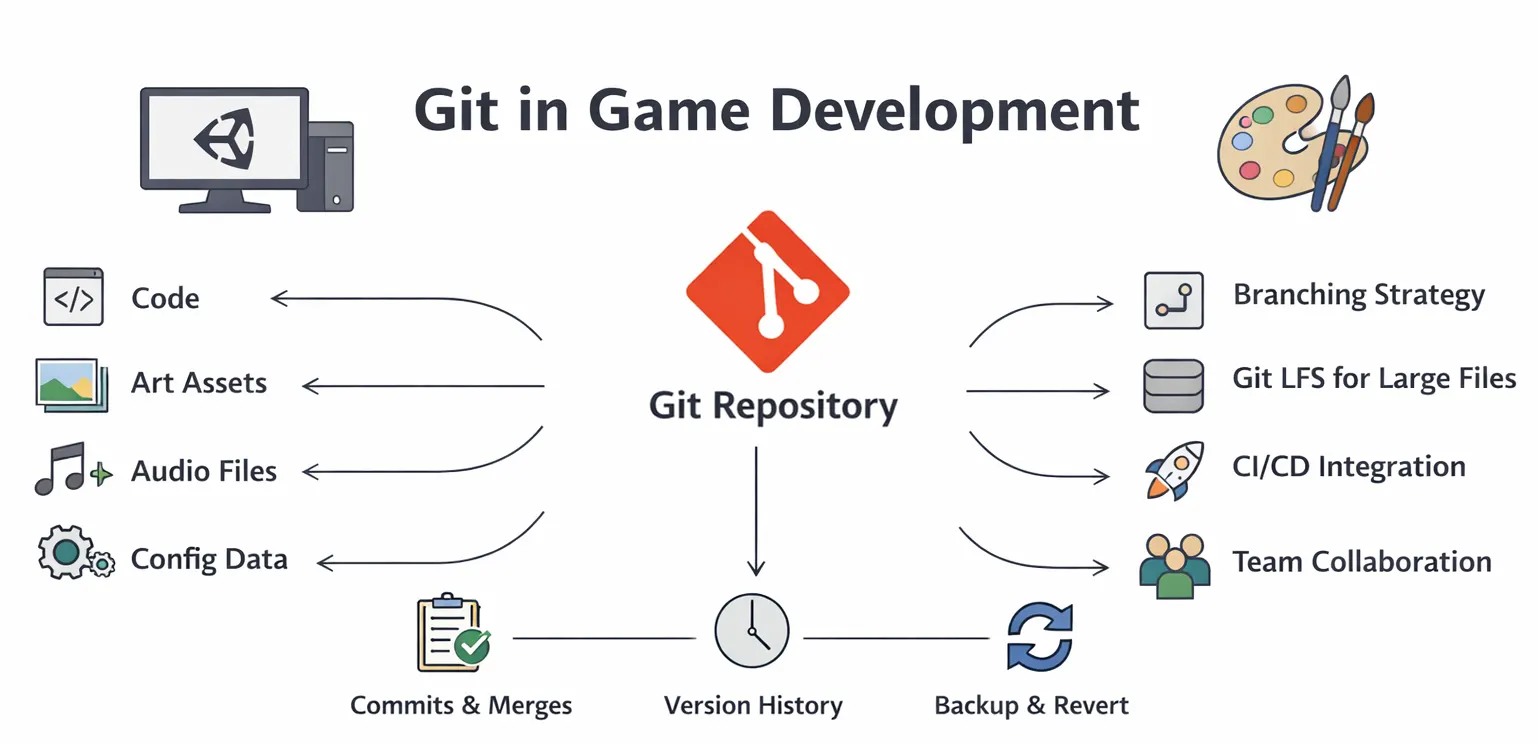
Master Git in game development with advanced workflows, Git LFS, Unity setup, and real studio practices for scalable collaboration.
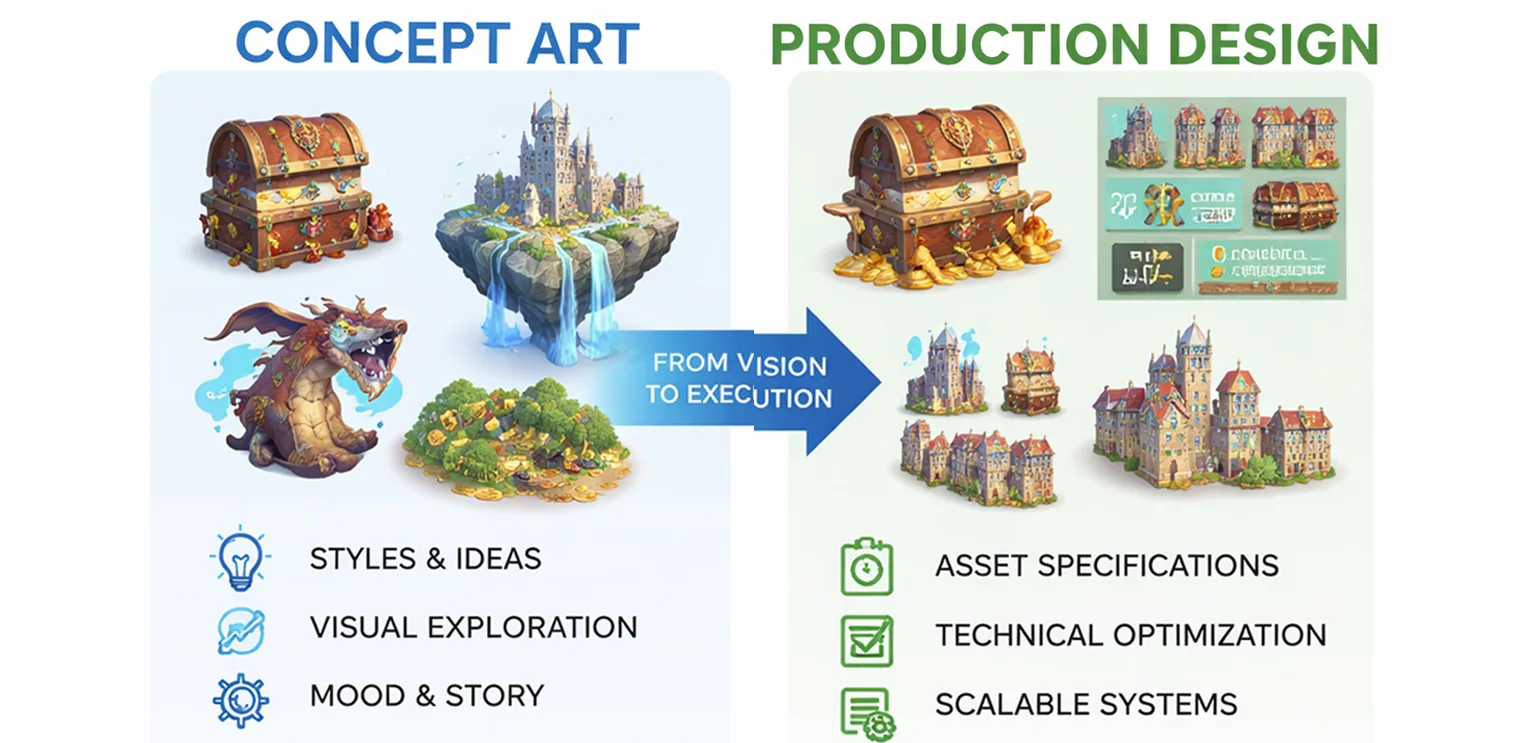
Learn the real difference between concept art and production design in games, and how studios turn ideas into scalable, production-ready assets.
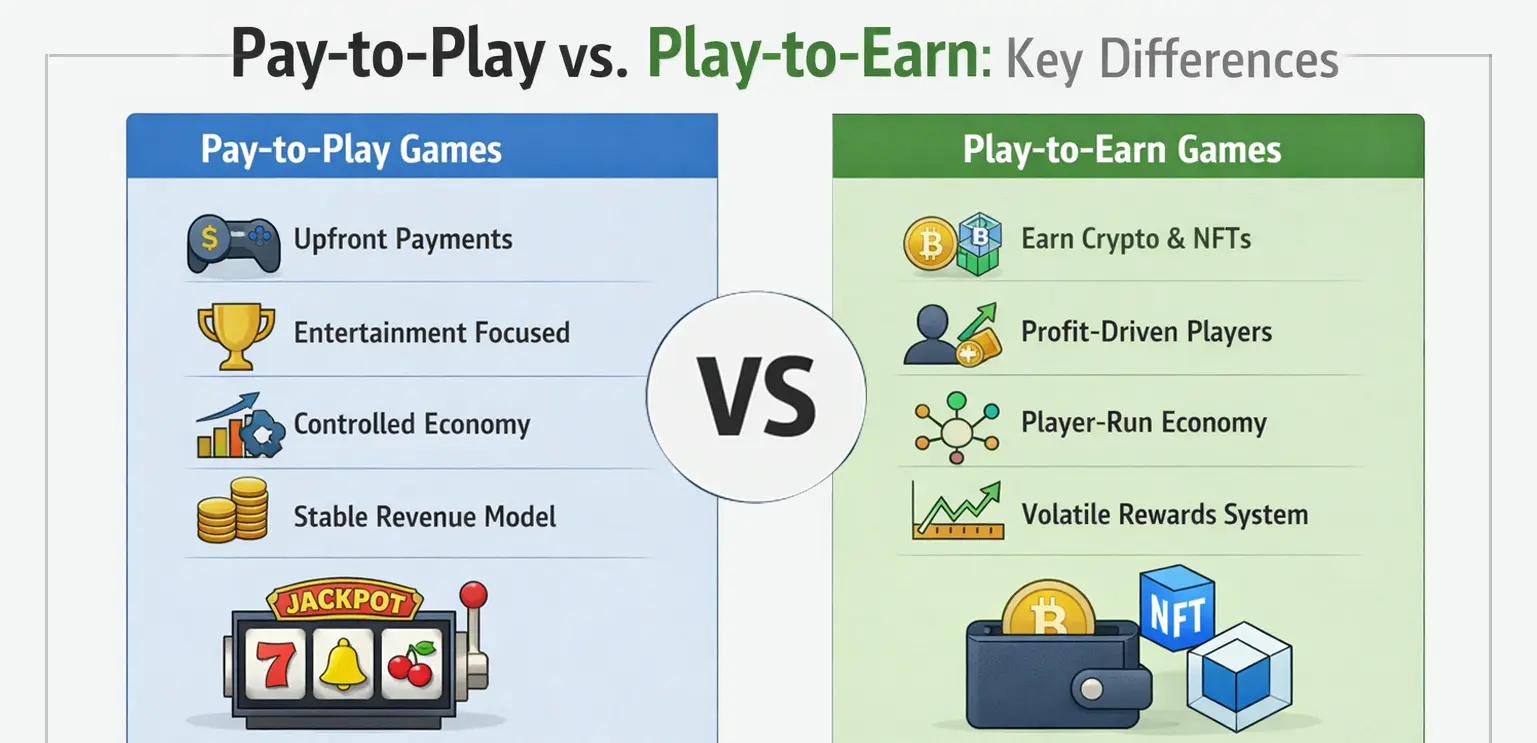
Explore the differences between pay-to-play and play-to-earn games, including monetization models, player behavior, and long-term sustainability.
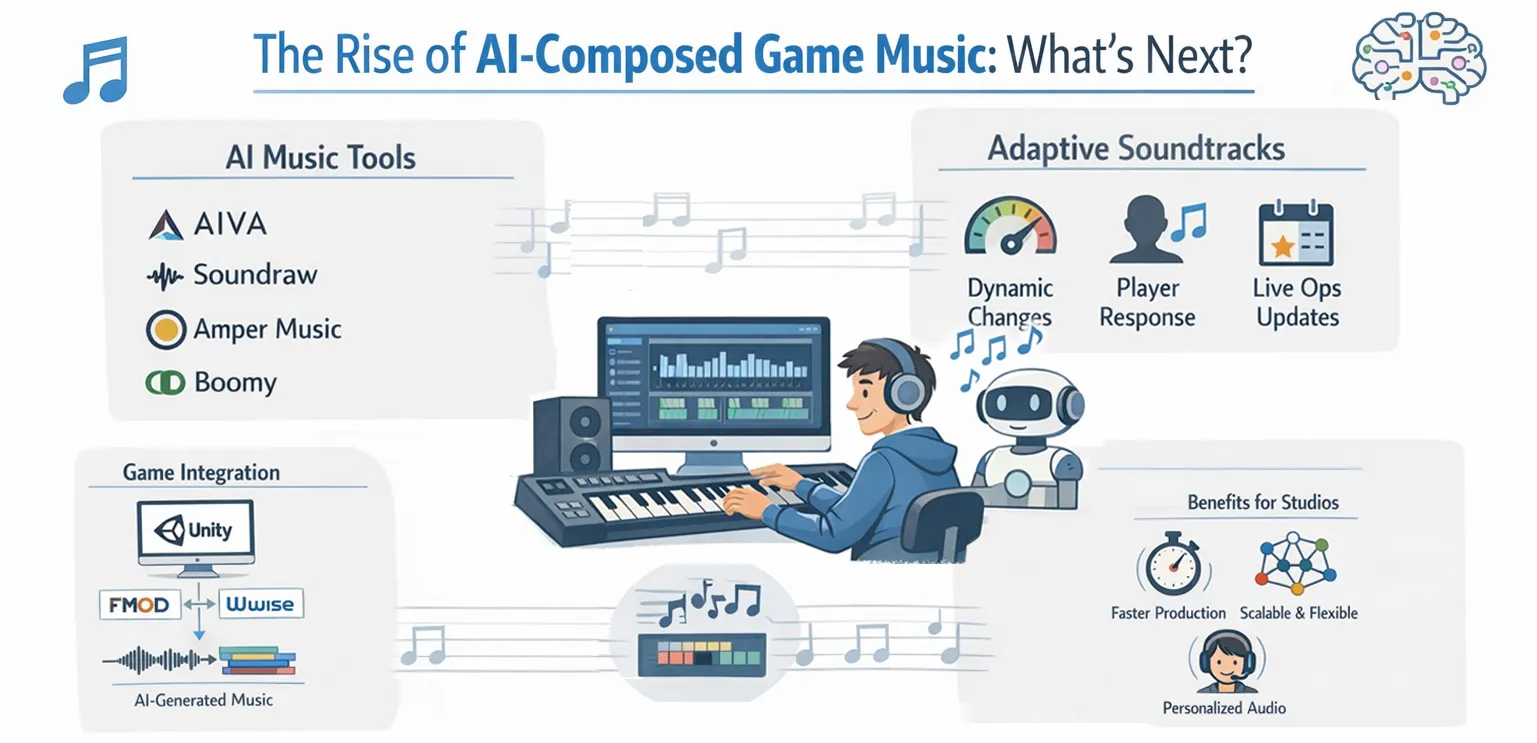
Discover top AI music tools and how AI-composed audio is transforming game development, pipelines, and player experience.

Should casinos build in-house games or buy from providers? Explore costs, ROI, control, and scalability to choose the right iGaming content strategy.
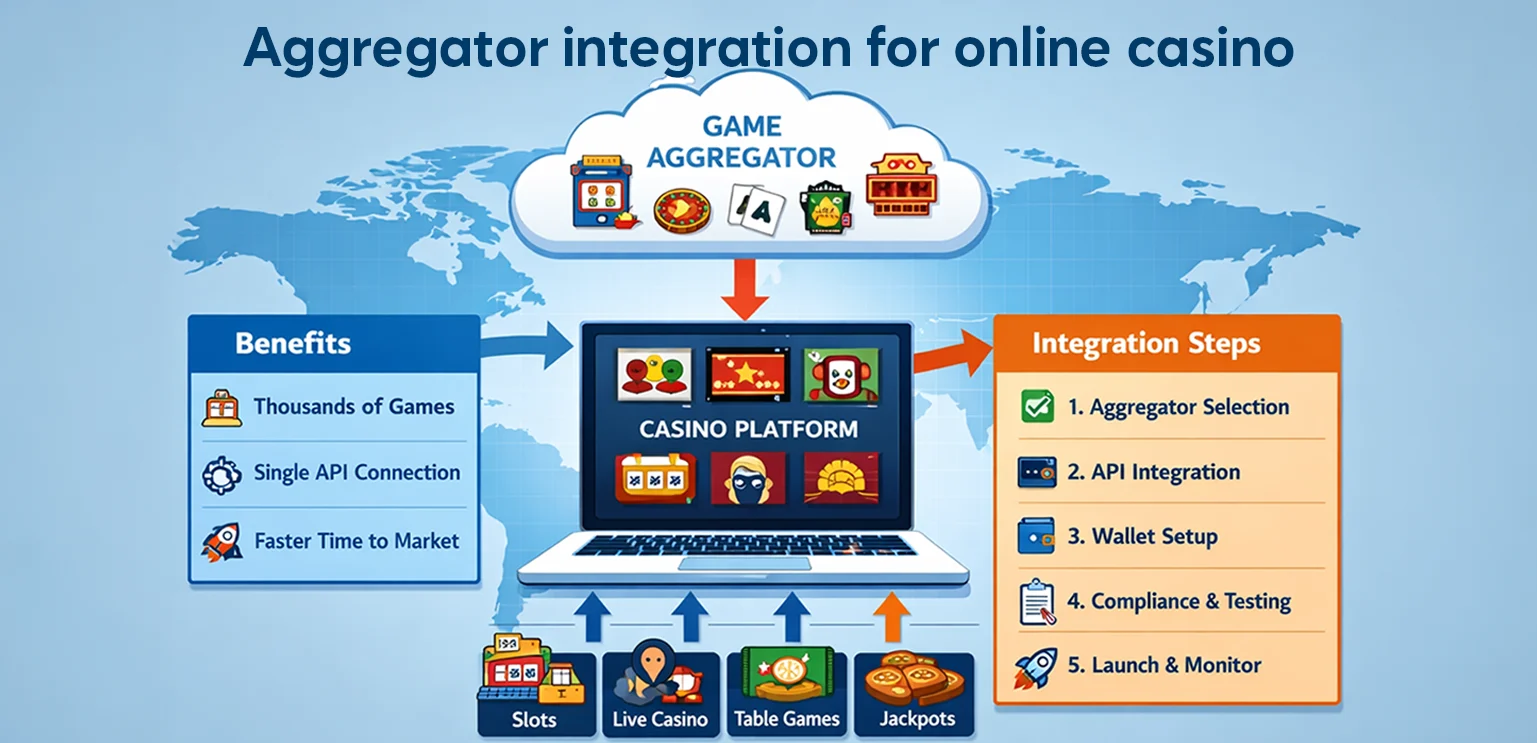
Learn how to integrate casino game aggregators. A complete guide for new online casinos covering APIs, compliance, content strategy, and launch best practices.
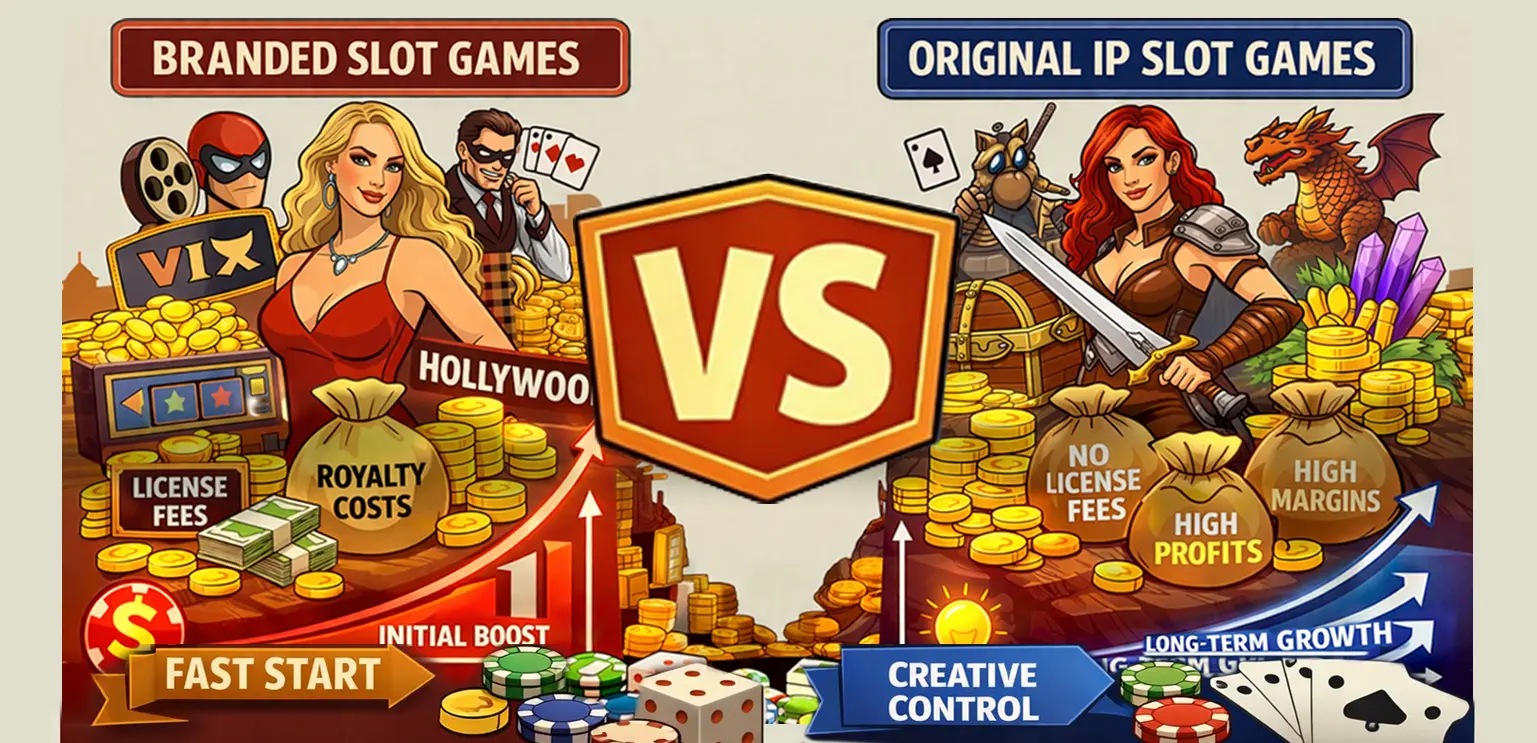
Compare branded vs original slot games ROI. Learn how licensing, player acquisition, retention, and costs impact casino profitability and growth.

Explore how sound design impacts gameplay, retention, and performance. Learn audio pipelines, tools, and best practices for modern game development.
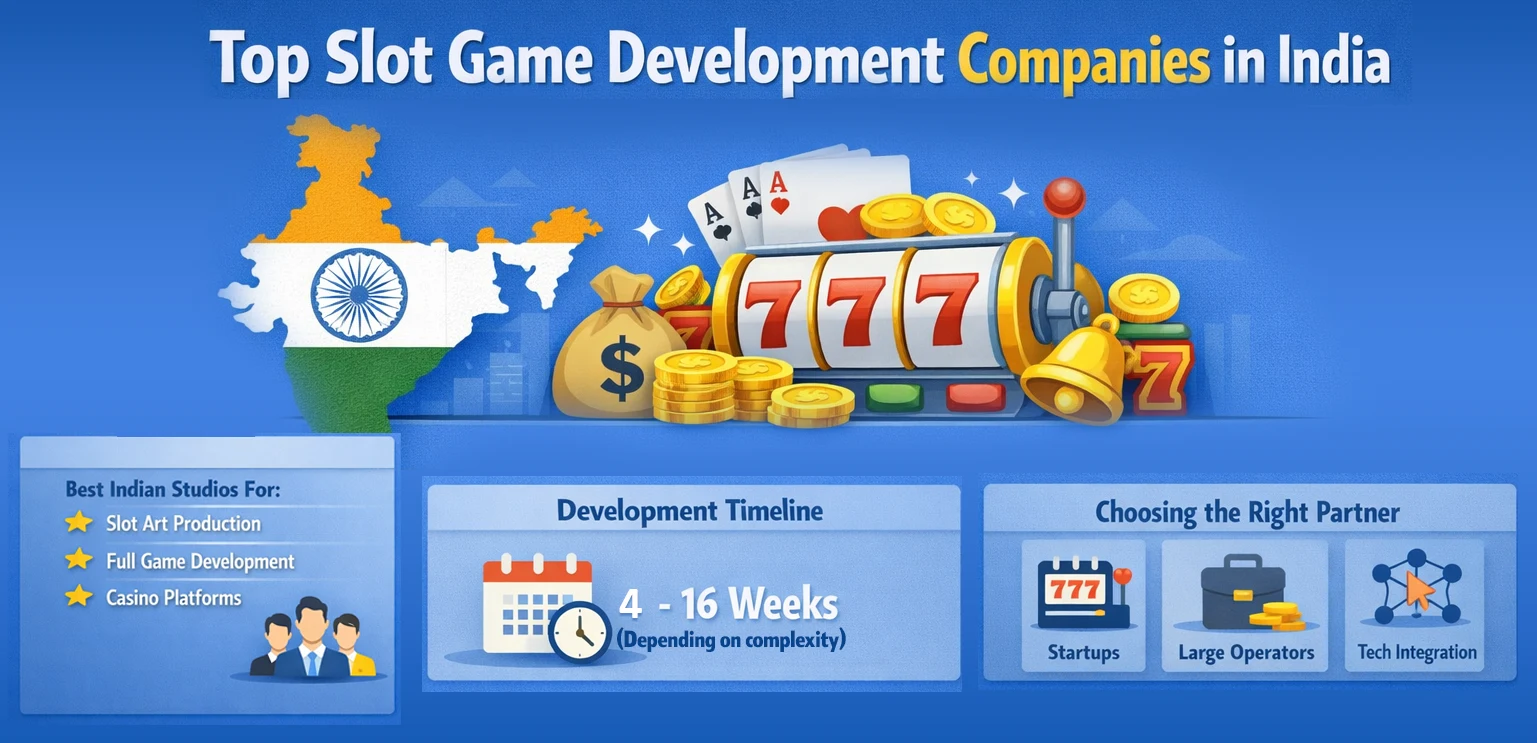
Explore top slot game development companies in India with pricing insights, use cases, and expert tips to choose the right iGaming partner.